All about rendering
Process, materials, tools, secrets, tips, and answers about ready-mix render, for one of the most fundamental techniques related to the structural care of a home.
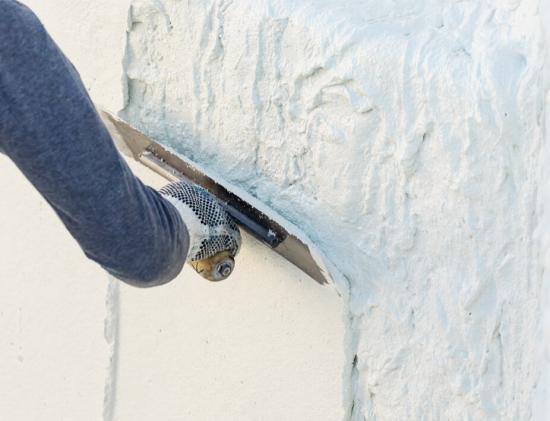
Rendering is the technique of coating surfaces (walls or ceilings) with a mortar (a layer of a mixture made of gypsum, cement mortar, sand, lime, etc.), which aims to smooth the surface, protect it, and prepare it for painting or cladding.
In this article we will look at the stages of the process, from choosing materials and preparing the substrate, to mixing the render, applying the layers, the finishing, and the common mistakes you should avoid. The degree of difficulty depends on the type of render selected.
In contrast to traditional rendering - where significant experience is required due to the many technical variations - the ready-mix one-coat render solution truly simplifies and speeds up the process. In any case, the result depends on careful execution of every step and good preparation, but it still requires patience, attention to technique, and practice.
The basic stages and materials of rendering
The process consists of 3 main stages. The first stage, known as the “scratch coat”, is a rough but relatively thin layer of traditional render (made of grey cement and other materials) which acts as a primer over common construction substrates.
In the second stage, the “base coat”, the technician applies a thicker layer of render (cement, hydrated lime, quartz sand) that smooths the surface.
The third stage is called the “finish coat”, which is the final render based on white cement and marble powder. All of this is prepared by mixing each batch with the correct ratios of materials as specified by the manufacturer or the recipe.
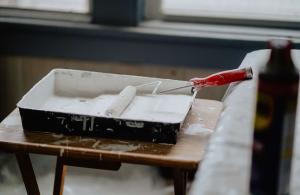
Naturally, before you begin, you need the appropriate tools for rendering. The essentials include a mixing container, a mixer, bucket, rendering trowels, a hawk or float or spray-machine applicator, a rubbing board (for sanding after application), sponge, brush, cleaning cloth, and a container for holding the mixed render.
Rendering with one-coat ready-mix render
This practice refers to the use of pre-formulated render mixes that require only the addition of water before application. These mixes typically contain cement, sand, gypsum, lime, and polymer additives for enhanced adhesion and durability.
The one-coat ready-mix render has the advantage of replacing the last two stages of traditional rendering (“base coat”, “finish coat”), thereby saving valuable time, materials, and labor cost. With one application, it simplifies and accelerates the work, creating smooth, durable surfaces ready for painting or further finishes.
It is easy to use and can be applied either by hand or with a spray machine. Additionally, it offers improved workability, something appreciated by novice users.
Its advantages also include high resistance to frost and moisture, as well as good breathability, while cooperating excellently with all construction substrates.
Finally, the curing time of ready-mix render is usually faster due to the polymers it contains, compared to traditional render which in most cases requires more time to fully stabilize.
The one-coat ready-mix render, such as the popular LevelWall One by KRAFT Paints, is ideal when fast project completion is required, when time or labor availability is limited, when high quality and durability are needed, and when the surface requires a uniform finish without imperfections.
Substrate preparation & process
The success of rendering depends greatly on how well the substrate is prepared. Dust, imperfections, and fragments of old render or paint must be removed. Use a brush to scrape and remove where necessary. If there are wall plugs, they must be removed with a screwdriver and pliers and the holes filled.
Next, after completing small repairs, it is recommended to lightly moisten the substrate (spray or sponge) before applying the render.
Regarding the process, the mixing of the batch must be done correctly to achieve a thick, homogeneous mass without lumps. Application can be done with a trowel, in layers 2.5 to 5 mm thick, allowing each layer to dry properly. When the surface firms up slightly, you may pass over it with a sponge or soft brush for smoothing.
Render repair: Step-by-step
Render repair is a similar process, requiring proper preparation and suitable materials, and concerns isolated surface areas. Below are the basic steps:
Substrate preparation: Remove loose or hollow render pieces with a hammer and chisel or a trowel. Clean the area from dust and debris.
Bonding application: For improved adhesion of the new render, apply a primer or bonding additive on the substrate.
Mixing and applying the render: Mix the render according to the manufacturer’s instructions. Here, a product like Fast Repair 70 by KRAFT Paints can be extremely helpful due to ease of use, application, and durability. Apply the mixture to the repair area with a trowel, pressing firmly to fill the gaps.
Smoothing and drying: Smooth the surface with a trowel. Allow the render to dry completely before proceeding with further work, such as painting.
This process is suitable for small repairs and can be done with basic tools and materials. For larger or more complex repairs, professional advice is recommended.
Technical details to pay attention to
- In very damp or mold-affected wall areas, first resolve the moisture issue (e.g., repair leaks).
- Before applying the render, it is recommended to moisten the substrate to prevent water absorption from the mix and premature curing.
- Avoid application in very hot or freezing weather. The ideal temperature is usually 10 - 25°C. Allow the render to dry slowly, avoiding intense heat or direct sunlight.
- Do not mix excessively large batches that you cannot apply before they set.
- In exterior applications or very hot weather, a light water spray afterwards may be needed for uniform curing.
